Download your favorite lightbox script that supports iframes. For this tutorial we will use the Colorbox script. So go ahead and download it to your server.
Adding the script & css code to the write tab
There are 2 ways to do that:
Option #1. download and install the bot_write_tab_customize plugin
After installation go to Extensions > bot_wtc click on Additional js code and paste the code inside, then click on “Update”.
Option #2. Edit the txplib_head.php file (Make a backup file first), located in /textpattern/lib/, and add the code after the following:
<script type="text/javascript" src="jquery.js"></script>
<?php echo script_js(
	"var textpattern = {event: '$event', step: '$step'};"
); ?>
The code required for both options is:
<script type="text/javascript" src="/scripts/jquery.colorbox.js"></script>
<link rel="stylesheet" href="/scripts/colorbox.css" type="text/css" media="screen" />
Change the path to reflect your own settings.
Now after we done with all the preparations, let’s get to the point where we add the code for these lightboxes-iframes and change the fields’ labels (the code goes below the lightbox script that we added before):
<script type="text/javascript">
$(document).ready(function(){
// ---
// Example #1 : Adding a "upload" link to the Article Image field, that will open the images page.
$("label[for='article-image']").replaceWith("<label for='article-image' class='YOUR-CSS-CLASS-NAME-IF-YOU-WISH-TO'>Image # [<a rel='upload_image' href='?event=image'>upload</a>]</label>");
$("a[rel='upload_image']").colorbox({width:"95%", height:"95%", iframe:true, overlayClose:false});
// ---
// Example #2 : Adding a "upload" link to custom field #7, that will open the files page.
$("label[for='custom-7']").replaceWith("<label for='custom-7'>File ID # [<a rel='upload_file' href='?event=file'>upload</a>]</label>");
$("a[rel='upload_file']").colorbox({width:"95%", height:"95%", iframe:true, overlayClose:false});
// ---
// Example #3 : Adding a "Youtube" link to custom field #10, that will open Youtube website.
$("label[for='custom-10']").replaceWith("<label for='custom-10'>Video URL [<a rel='youtube' href='http://www.youtube.com'>Youtube</a>]</label>");
$("a[rel='youtube']").colorbox({width:"95%", height:"95%", iframe:true, overlayClose:false});
// ---
// Example #4 : Just changing the label title of custom field #2.
$("label[for='custom-2']").replaceWith("<label for='custom-2'>Some text here</label>");
// ---
// Example #5 : Adding a "My customized page" link to custom field #5, that will open a page using the rah_external_output plugin and we will set the size of the window with pixels "px" not with percentages "%" .
$("label[for='custom-5']").replaceWith("<label for='custom-5'>My Title [<a rel='mcp' href='http://www.your-domain.com/?rah_external_output=my_customized_page'>My customized page</a>]</label>");
$("a[rel='mcp']").colorbox({width:"900px", height:"500px", iframe:true, overlayClose:false});
// ---
// Example #6 : Adding a "Myspace" link to the Content tab (right after the Links link), that will open Myspace website.
$("li[id='Comments']").replaceWith("<li class='secondary tabdown2 inactive' id='Comments'><a href='?event=discuss'>Comments</a></li><li class='secondary tabdown2 inactive' id='Myspace'><a rel='myspace' href='http://www.myspace.com'>Myspace</a></li>");
$("a[rel='myspace']").colorbox({width:"95%", height:"95%", iframe:true, overlayClose:false});
// ---
// Example #7 : Changing the Content tab title from "Content" to "Menu".
$("a#Content").replaceWith("<a href='?event=article' id='Content'>Menu</a>");
// ---
});
</script>
Some explanation about the examples
Example #1
Will add a link with the title upload to the label of the Article Image field. You can also add class or id if you wish to.
Remember that before every “Colorbox” script code, there is first the “replaceWith” code, and that because of that it needs first to change the labels and add the <a> tag with the specific “rel” attribute, and only then Colorbox will recognize it.
Example #2
Same as in example #1, but this time for a custom field, custom field #7 and it will open the Files page.
Example #3
Will add a “Youtube” link to custom field #10.
Example #4
Will Just change the title of custom field #2 label.
Example #5
Adding a “My customized page” link to custom field #5. In this example I chose not to set the size of the window with percentages % but with pixels (width:"900px", height:"500px" you will know that this option exists if you want it.)
This example will open a customized page made using rah_external_output plugin. You first need to install the plugin, create whatever page you want, in the size that you want and then link to it.
Also, if you don’t want regular visitors to be able to enter that page, install the rvm_privileged plugin and add this tag <txp:rvm_privileged /> to the most begining of the page (before ). If you don’t want Google to track it just add the meta tag: <meta name="robots" content="nofollow"> .
Example #6
This example is for the Remora theme and will add a “Myspace” link to the Content tab, right after the Links link which will open the Myspace website. For it to work there is needs to make the next small change in the remora.php file:
From:
$out[] = "<li class='secondary {$class}'><a href='?event={$item['event']}'>{$item['label']}</a></li>";To:
$out[] = "<li class='secondary {$class}' id='{$item["label"]}'><a href='?event={$item['event']}' id='{$item["label"]}'>{$item['label']}</a></li>";Example #7
This example is for the Remora theme and changes the Content tab title from “Content” to “Menu”. Like in example#6 here we will also make a small change to the remora.php file:
From:
$out[] = "<li class='primary {$class}'><a href='?event={$tab['event']}'>{$tab['label']}</a>";To:
$out[] = "<li class='primary {$class}' id='{$tab['label']}'><a href='?event={$tab['event']}' id='{$tab['label']}'>{$tab['label']}</a>";Here is a screenshot of the final result:
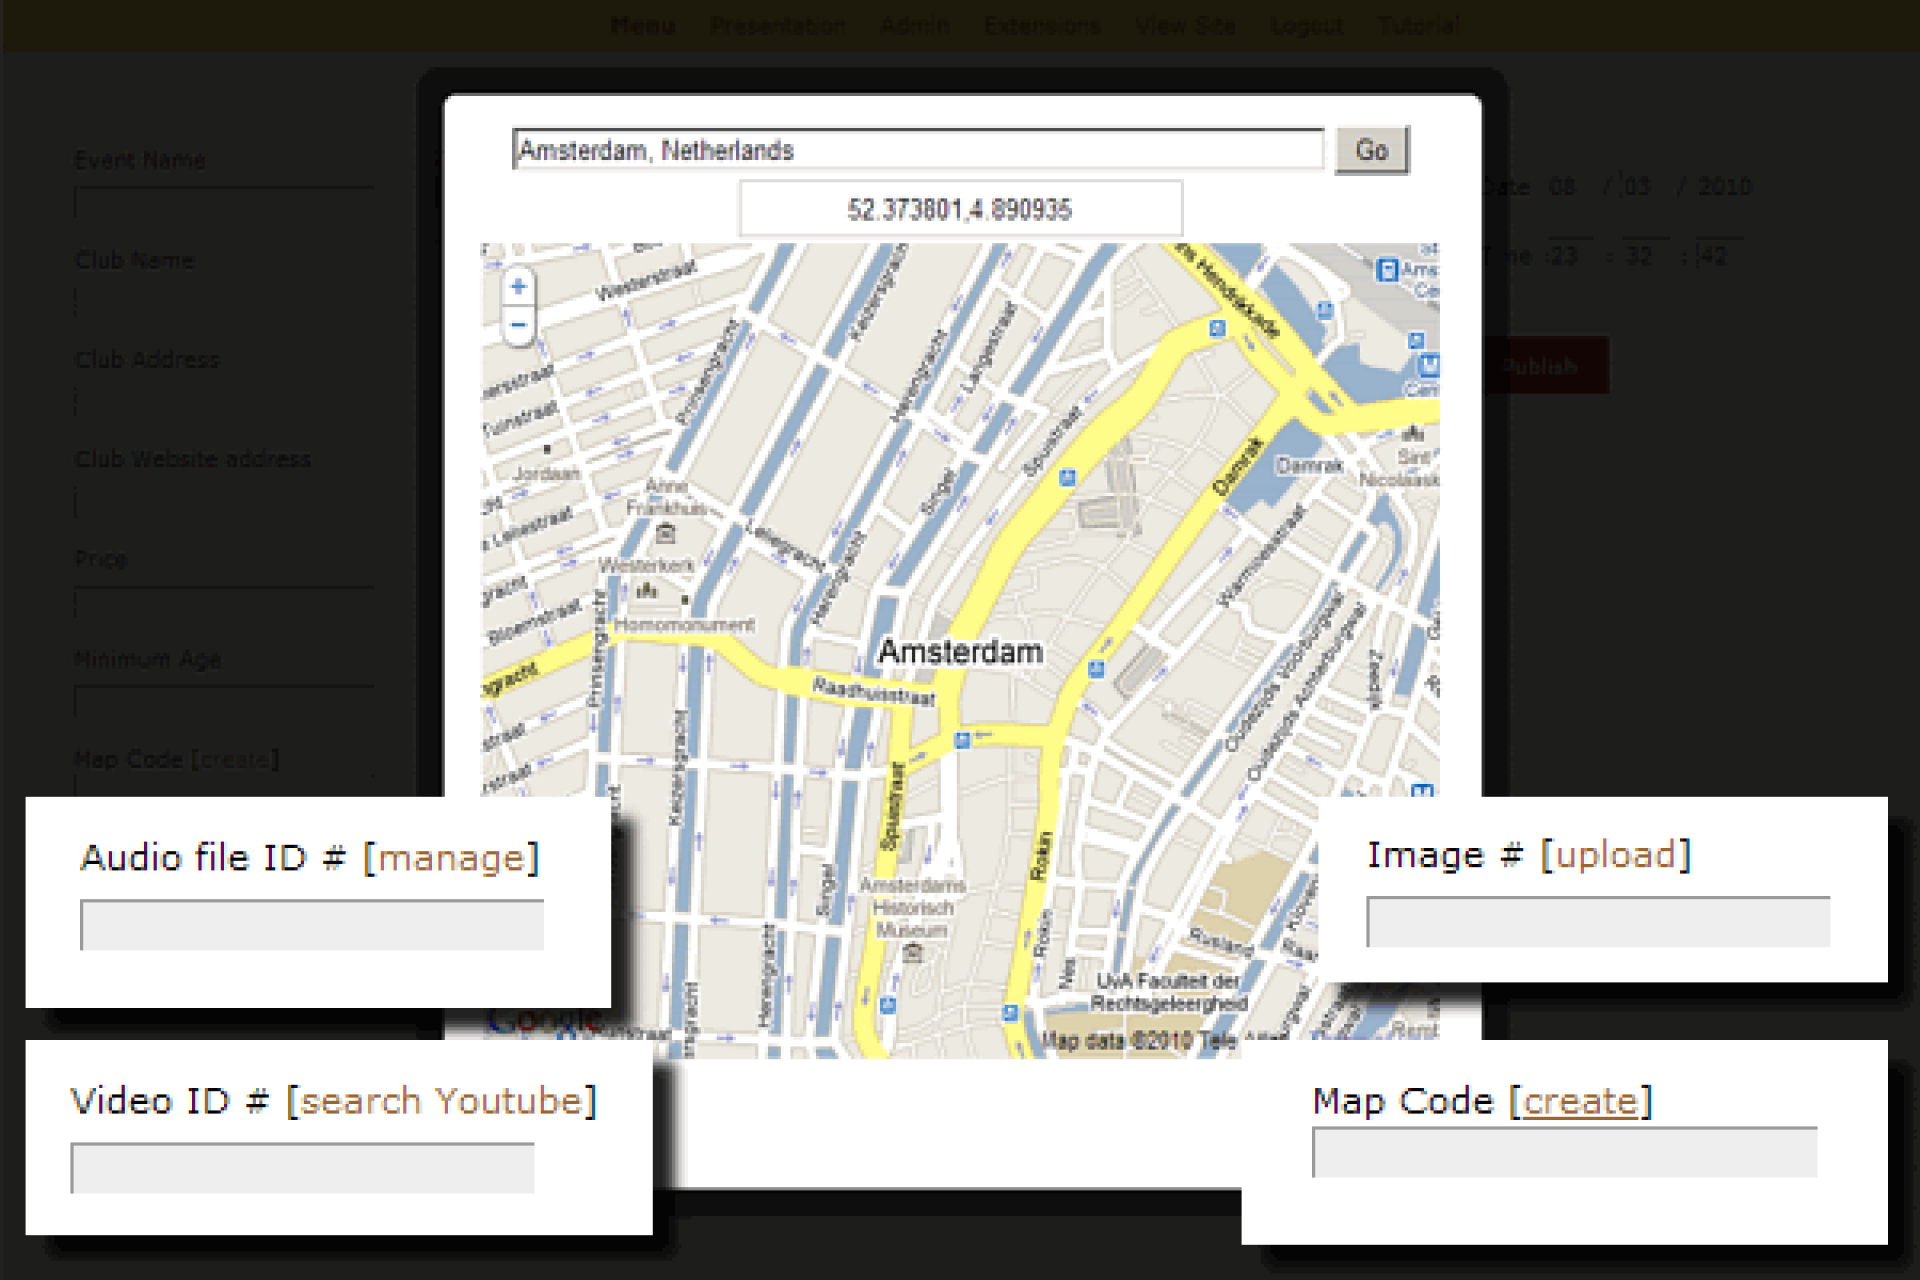
Notes:
- Examples #6&7 can be also done for other theme then Remora, but you will need to use your editing skills to make it work ;)
- If you know JS/jQuery you should also check the Colorbox attributes like: onOpen,onLoad,onComplete,onCleanup,onClosed and use functions.
- Further information on the forum thread